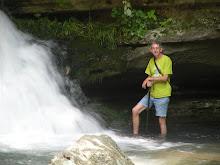
Monday, January 19, 2015

PHOTO CLASS COMING!
Do you know what all the letters and little icons on your camera dial mean and do you know how to use them?
Would you like to?
You're in luck. I am in the early stages of putting together a beginner's photography class for new, and or, confused shutter bugs.
YOU can learn to use these icons, lighting techniques, compositions, action sports, family portraits, family events, concerts and more.
Classes include class room instruction and a cool field trip to practice techniques where you can make new friends with the same interests.
Classes are $50 and guaranteed to be fun and unlike any other classes you will find.
As a 6-time award winning AP photographer who shoots almost daily and a former student of well-known local photographer Barney Sellers,,I will give you the benefit of my "Been there, done that" experience.
Also learn techniques for saving images, printing, framing and more....
Interested? Send me a private message to get placed on a student roster, space is limited to 15 slots.....contact me now to secure a slot.
Private message on Facebook or email tmacphotos@gmail.com

Monday, June 6, 2011

Summer photo tips

The calender says it's still spring, the temperature in North Central Arkansas says different, with daily averages running in the low to mid 90s.
Just as winter conditions place challenges on photographers and equipment alike, so does the summer season.
The first concern I have as a news photographer, is not to leave my camera gear in a hot car. I just have to remember to grab it on my way out the office door.
In the winter I leave my camera in my Jeep to avoid moisture build up by going from outdoors cold to warm buildings. But in the summer time I try to always take it inside whenever possible because I often leave my vehicle windows rolled down. And open car windows are an invitation for anyone walking by to help themselves to expensive camera gear.
Extreme heat can be generated in a closed car. A camera left for extended periods in the cabin or trunk area is very likely to incur internal damage to sensitive electronics.
Summer photography often involves outdoors events where dust can be a real problem, especially around little league/soccer parks and rodeo arenas.
It's important to keep the lens capped when not in use and then use a soft brush to clean dust off the lens before use.
If at all possible, DO NOT change lenses in dusty conditions on SLR (single lens reflex) cameras. Pick the right lens ahead of time and stick with it. Every time that lens comes off the camera, dust will be going in to either clog up the internal works or put specks on photos.
If you have a question about whether your lens has inside dust, do a "sky check".
This simply means point your camera upward toward an open sky, any dust on the lens will show up as dark spots on the lens. Use an air bulb and brush to clean the lens.
Blowing into the camera by mouth can cause spittle to splatter and still not dislodge dust. Use of compressed air can cause dust to scratch camera mirrors, as can use of the shirt tail.
Cameras aren't water proof, but a light sprinkle won't be a major threat if you can keep water from entering around the lens connection. During a hard downpour keep the camera dry!
In several instances as a news reporter I find myself at an accident scene where rain is soaking everything in sight. This is when you (A) stay inside and skip shooting (B) use an umbrella (it can be done one handed), or (C) keep camera under cover until time for shots and then get into dry area and towel it off thoroughly before changing lens or opening any compartments.
Sun flares on the lens can be hard to notice in bright sunlight. Check for them before you take the shot. If necessary use a hat, or hand, held above and slightly in front of lens to block sun from shinning directly into lens. Careful not to get hand too low, otherwise you get a shot of your palm.
Now about the photographer.
When you know you are going to be outdoors in extreme heat, wear appropriate clothing. This means light colored and loose fitting. A hat and water are important as well..
Remain hydrated. A small water bottle with a belt clip can keep water with you during a shoot. A small ice chest with water and an energy bar and kept in your vehicle can be of great value too.
Keep a light colored towel handy for wiping down camera and removing sweat. This same towel dipped in water of ice chest and used on the face can serve as a reviving breath of life. Be careful of heat exhaustion.
Other things to consider on an outside summer shoot are:
• sun screen-get the water proof, non-greasy type
• mosquito and tick spray for wooded areas
• anti-itch ointment for the ticks or mosquitoes that got past your spray, and for poison ivy
Summer camping trips to a lake or river where you can get a shot of the sunset over the water can give you some really awesome pics.
Some cameras offer a special setting that enhances any colors you see. A rotating polarizing filter can also give some great color intensity. Some of the best sunsets can be shot in mid summer when the humidity is high and reflects back the sun's rays into a rainbow of colors.
But just like winter photography the main thing is to have all your batteries charged and your cards clean before you hit the outdoors with the camera.
Summer is a great time to introduce a youngster to the world of photography by getting them an inexpensive digital camera and teach them to scrap book their summer adventures.
Good luck and good shooting!

Friday, October 15, 2010

Fall color photo tour

Video Below!

T Mac Photos has teamed up with the folks at Exploring Izard County to offer a fall color photo tour onto both public and private property to photograph some beautiful waterfalls, creeks, general scenery, historic churches, stores and other buildings.
We will be leaving the Blue Bird Cafe (Mount Pleasant, Izard County) around 8 a.m. Oct. 30 and wrap it up around 3 p.m.

In addition to appropriate foot gear (no sandals, heels, flip-flops, etc.) for walking/hiking, participants should also dress in layers and bring rain gear in order to adapt to possible changing weather conditions.
Sorry, but there are no arrangements made for children or pets, this is a photographer's tour.

Small, low slung vehicles may have difficulty on a few rural roads.

Needed equipment....a camera (any type-film or digital) plenty of film/cards, hot batteries. A tripod is optional but can be useful.
Some vehicles will be equipped with AC power outlets and emergency recharging can be done during the tour.
A sack lunch will be required---toilet facilities will be "wild bear", so bring TP and hand sanitizer.
A small fee ($20 per person-$30 per couple) and a sack lunch is required.

Space is limited on this tour. For more information, or to preregister send us a message at tmacphotos@gmail.com.....


Tuesday, August 10, 2010

Calico Rock mystery cave

In no particular order, here are some shots of mystery cave at Calico Rock (AR)


Recently made a trip with some friends to a cave in Calico Rock (AR) that is somewhat of a mystery. It seems that no one in town has any knowledge of the cave, how it was formed, how it was used, or any other type history.
It was divided into three rooms by well built sandstone walls and included a clear, deep underground water supply, I suppose cistern would be the best term since the cave was on a high hill overlooking the White River. Land owners request no further information be given regarding its location.
There is speculation it could have been used as a holding area or hide out for slaves, or an ammo dump during the Civil War, however, I feel it is really too damp for ammo storage. There is seeping water dripping from the ceiling in the smaller back room of the cave.

It may possibly have been used as a saloon or even a temporary home for awhile. There are very distinct notches in the sandstone rock walls where boards were placed as shelves.
The cave is cleverly disguised from the public and there are obvious signs of improvements to the cave that have been made over the last hundred years or so.
For more information on this mysterious hole in the ground, visit the folks at Exploring Izard County.
Taking photos inside the cave was easier than I expected. The main opening was large enough that ample light/coupled with my camera flash gave good exposure.
In the remote and darker rooms, the area was small enough that the flash was sufficient. We did however supplement lighting with portable lanterns or flashlights just to be on the safe side.
Some video was shot by the fellas at Exploring Izard County and is posted on their blogspot.


Saturday, July 24, 2010

Skirmish at Lunenburg

On January 20, 1864, a detail of 44 men of the Fourth Arkansas Mounted Infantry Volunteers (U.S.) under Capt. T. A. Baxter, the brother of a future Arkansas governor, attacked Col. T. R. Freeman's Confederates, driving them from their camp at Lunenburg.


Four Confederates were seriously wounded and two were captured, along with horses and equipemtn. The Fourth Arkansas lost one man killed in the skirmish.


Most of the men in both forces were residents of Izard County.


On July 10, 2010, a group of Civil War re-enactors from Izard and surrounding counties, as well as central Arkansas, camped ont he grounds of the Lulnenburg Community Center for the weekend and performed two re-enactments of the famous skirmish in a nearby field that may very well look today as it did then, minus the power poles.

The camp included a gambler's tent, shown here, a surgeon's tent, various pieces of equipment accurate to the Civil War time period, including a field mortar, full sized canon, along with accurate clothing a firearms for the era.

It was a great time in spite of the near triple digit heat...there were some wonderful photo ops and my wife Roberta got a shot of a Union Soldier on horse back crossing the battle field that was printed out in sepia tone to imitate the old tin-type photos.

It was enlarged to 81/2 x 11, matted up to 11x14 in a polished dark brown faux leather mat, then framed in barn wood.
It looks awesome and I'll be posting it here for viewing soon, when we get it home from the Independence County Fair where it not only won a blue ribbon, but BEST OF SHOW!


Union cavalry


Rebel camp in Lunenburg field


Professional gambler that followed soldier's camps, like the one below


Recently erected marker of Lunenburg Skirmish, Izard County, Arkansas


Lets see the color of your money soldier


The gambler's tent attracted all kinds
Thanks to those who make re-enactments a living part of history!


Saturday, May 8, 2010

Lost Valley Cave waterfall

As many folks know, the one place that ranks really high on my list of places to hang out, hike and take photos, is in the Boxley Valley area near Ponca in Newton County (Arkansas).
I've been going there for 10 years or so and still haven't hiked most of the trails, and the scenery changes almost weekly, and certainly in each major season.
Whether hiking up the side of a mountain, along a the lip of a cliff trail, or along the banks of the Buffalo National River, there's always something new.
A while back I had the opportunity to explore Lost Valley Cave near the campground and along the creek by the same name.
For years the mouth of the cave was as far as I got. But then, I made it a mission.
I met up with four adventurous ladies piling out of their Jeep as I was gathering my gear, we struck up a conversation about the cave and when they learned it was my first trip inside, I was invited to tag along with them. It wasn't their first time.
The short hike up Lost Valley Creek (.9 mile) is rated easy-moderate, there are some steep rocks in a few places and some switchbacks that raise your heart rate and test the knee joints.
In the summer the trail is busy, and the cave is a popular spot to cool off with a breeze blowing off an inside water fall that drops some 30 feet before winding its way to the cave mouth to form yet another waterfall. Two more smaller falls are located along the creek before it dumps into the Buffalo River.
The large rock entrance to the cave is worn smooth by thousands of feet each year, and stays slick with the mist from the water fall.
Once you maneuver past this hazard, the floor becomes somewhat better, but the walls narrow down to just a few feet in width, narrow enough to sometimes challenge even my skinny frame.
In a place or two, jagged rocks stick out from the sides of the walls and require twisting, squirming, and ducking (all at the same time) to get through. If you meet someone in these areas, somebody has to back up! Then will come an area where people can pass side by side.
Before reaching the waterfall chamber, the air cools just a bit more and the sound of water falling echoes along the narrow tunnels.
It's a sound that makes you more eager than ever to see what lies ahead.
To explore the cave you should first have proper footwear. Water sandals with good support straps are great, old tennis shoes, or hiking boots work too. DO NOT wear flip-flops, slip on sandals, or your high heels!
Also be prepared to get dirty, possibly downright wet and nasty, depending on how high the water level is inside the cave. After a heavy rain there are some spots you might have to wade water nearly a foot deep. And remember those areas I mentioned where you have to squat and squeeze to get through? Well, you may end up with a wet booty after a rain.
We saw one lady in nice white tennis shoes, white capris, and a pretty yellow top headed into the cave and wished we had time to hang around and see what she looked like afterwards.
A light is a necessity. What seemed to work well for myself and my escort of ladies, were LED lights that fit on a cap or on a headband. The light can be tilted so that it pretty much shines wherever you look.
What you DON'T NEED is a lot of the stuff I carried along in a large fanny pack with suspenders. I didn't need the large 6-volt lantern, the tripod one of my guides so kindly lugged for me, and the pair of sandals I thought might be needed instead of my mesh hiking shoes. I'm always tryng to think of everything I MIGHT need, and then try to carry it with me. It's a weakness, what can I say?
As is often the case, at the end of the cave is a large room with a pretty level floor of solid stone with the waterfall at the back of the room.
In most cases photography in poorly lit rooms in a house is a real challenge, I was surprised to discover that in a cave a simple camera flash is fairly effective since there is no outside light to interfere with the camera's light sensor.
The LED lights, along with lights the other dozen or so people inside the roodm had, was more than ample for a fw decent photos.
The tripod wasn't necessary, but I did use it because we all wanted our picture taken together, so I just shot with the timer and ran like a mad man to get into the shot. Got it the second try. We could have had someone else take our photo, but nice strangers aren't always good photographers, you never know how it will turn out.
So, If you want to do a pretty easy hike along a beautiful creek with waterfalls, a shelter cave, tumbled boulders the size of a small house, and a cave waterfall, then Lost Valley Cave is your place.
The cave is just a few miles south of Ponca, which is about 30 miles south of Harrison on Highway 43. Just go to Yahoo maps for directions.
And how about lodging? There's primitive camping along the creek leading to the cave, lots of rocky lumps, limited number of campsites and primitive toilets.
Back up the road at Ponca is the Lost Valley Canoe and Lodging camp ground. Lots of shaded, grassy campsites that are always well mowed and there's even a bath house with hot showers, outside kitchen sink, and a clothes dryer.
Across the street at the office is a general store with everything needed for a weekend or a week's stay. Camping gear, groceries, gas, ice, and other supplies.
They are also the premier float outfitters for the upper reaches of the Buffalo River with canoes, kayaks and rafts for rent, and they offer overnight floats too.
If roughing it isn't your style, there are cabins available with full facilities, including an outdoors hot tub on a private deck.
You can reach them at 870-861-5522.
E-mail....lostvalleycanoe@gmail.com
Check out their new website...www.lostvalleycanoe.com
Tell them I sent you, and look around, you might even see my ole Jeep parked on the side of the road or at a trail head somewhere, especially if there's a waterfall nearby.

Monday, April 26, 2010

Devil's Den State Park


PHOTO OPS AT DEVIL'S DEN INCLUDE, bluff view from Yellow Rock, one of many wildflowers along trails, tree stump destoyed by bear looking for grubs and bugs, and waterfall along DD Trail.


Spring in the Boston Mountain Plateau of the Ozark Mountains in northern Arkansas is a great time of the year to hit the hiking trail with your camera.
More specifically, the trails of Devil's Den State Park located just south of Fayetteville.

Created in the 1930's as part of the federal Civilian Conservation Corps, Devil's Den was one of the first state parks in Ark. and the many hand-built cabins, bridges, and trails offer outstanding photo ops. An example is the hand-built stone dam across Lee Creek, featured as our main blog photo.

Of the many trails available at DD, the two I enjoyed the most are (in order of popularity) Devil's Den Trail and the Yellow Rock Trail.

The DD Trail offers a three-stage water fall that can be magnificent after a heavy spring rain and at the least "pretty" at other times.

Bat caves, huge crevices, fallen boulders as large as houses and weird rock formations, along with enough wildflowers to make a full bouquet, make this trail the favorite with many visitors. This relatively easy and short trail, suitable for most family members, starts right behind the visitor's center.

From atop massive cliffs riddled with crevices and caves, the Yellow Rock Trail offers some incredible overlooks showing Lee Creek carving its through the valley. In order to preserve the wildness of the area, these cliffs don't have warning signs or safety rails, so watch your step and keep an eye on your kids.

Proper footwear, a water bottle and a snack are recommended for this trail, I DON'T recommend pets on this trail. And by all means DO NOT FORGET THE CAMERA!
This is a slightly longer and tougher hike, but the photo ops are countless. The switchback trail seems to offer something new at every turn.

Unless you are just a hard core hiker that likes to walk up hill a lot, I DON'T recommend the Overlook Trail. Just get in your car and drive to the lookout point if you must, but you will only look down into a heavily wooded valley. The CCC style pavilion is cool and a good place to relax, but not worth nearly the nearly 5 mile hike in my opinion.

There are other longer, tougher trails that should only be attempted by experienced cross-country, over night camper-hikers.

Lee Creek that runs through the heart of the park abounds with photo ops as well. From the stone dam to the small stone cabin along a remote stretch of the creek, to the old mill dam and homestead ruins. There are some excellent areas for family fishing or paddle boat rides.

The park offers a modern swimming pool, restaurant, store ( these are seasonal), laundry and quaint stone cabins with modern facilities, including satellite TV, modern full kitchen, some even with spa tubs!

After leaving Interstate 540, the closest gas station is in Winslow 12 miles away. And the closest digital camera batteries are some 30 miles away in Fayeteville!

If you're looking for new territory to explore, Devil's Den State Park in Northwest Arkansas should be on your agenda.
You can check out the park through the website www.mountainstateparks.com/devils-den/

Wednesday, February 24, 2010

CHEAP light box for viewing negatives/slides

Tired of trying to hold those 35 mm film negatives/slides up to a light bulb or in front of the window to find what you want? Then you need to get a negative light box.
I know, they can cost hundreds of dollars and it isn't worth it for the amateur photographer.

Well, how about 10 bucks?

Look in the lighting department of most department stores for a small portable under the counter fluorescent light. They are usually about 14-16 inches long, will sit flat on a desk top, or if you wish, can be mounted on a wall next to your desk for quick use.

Depending on your eyesight, a small magnifying glass might be useful.

WATCH FOR an upcoming blog on copying negatives and slides as digital images.

Monday, February 22, 2010

Adventure photos


With the coming of each season, and the trip down every road, we can find photo ops in some of the most common places, as well as off the beaten path and even into remote wilderness.
These are some of those places depicted by photos taken by myself and wife Roberta over the years....hope you enjoy and perhaps become inspired.

Sunday, February 14, 2010

Winter photo tips

Here are a few winter photo tips everyone should know.
Remember, when you are cold and not functioning at your best, the same applies to your camera gear.
* Protect yourself by dressing in layers and using chemical heat packs to keep hands, feet, or body warm.
* Protect your camera with a padded camera bag with one of these chemical packs inside to keep your battery warm and functioning. Or, if your coat is big enough, you can keep the camera zipped inside and use body heat in the same manner.
* To avoid condensation build up on the inside of your camera when you go from a cold climate to the indoors, either place the camera in a cool spot just inside a door for an hour and then move to a slightly warmer spot inside to let it warm up gradually, OR, place it in a large Zip Lock type bag BEFORE taking it inside.
This allows the condensation to build up on the inside of the bag and NOT in your camera.
You can go ahead and remove your card and process your photos while the camera is warming up.
* When shooting under damp conditions, mist, rain, snow, etc., protect your camera with a plastic camera glove (available from camera shops or online at Porter's Camera Store www.porters.com).
These sleeves have a draw string in the end of a long tube that snugs down around the end of the lens and then opens up to fit the camera.
At the back end of the sleeve is a cutout for clear viewing through your camera's eyepiece. However, with auto focus cameras this isn't a real issue, just look through the plastic to make sure you have the subject framed like you want it and shoot.
NOTE.... A plastic grocery bag with a hole cut in the end and fastened around the lens with a rubber band will also work in a pinch.
* Use a small umbrella to shade the lens from sun flares or getting false light readings when your subject is in the shade and your camera in the sun...also valuable in keeping rain or snow off the camera and lens when no other protection from the weather is available......there are umbrellas that can be attached to tripods that leave the hands free...otherwise it takes a little practice to handle all the gear at once....or you can take a helper along to hold it.
* If shooting snow photos, check your camera for a "snow" setting that will give you white snow, not gray.
For more info regarding this problem, go to the New York Institute of Photography web-site www.nyip.com.
*******If you shoot a film camera, when you submit your film for development ask for one "step" of blue to be eliminated. This will help eliminate a bluish/gray cast to trees, old wood and shadows.

When show hits, be prepared to get out into your neighborhood on foot to get those great shots of children building snowmen, snowball fights, snow shrouded shrubs, birds around feeders (especially Cardinals), etc.
LOOK for those unusual shots and have fun!

Monday, August 31, 2009

Boxley Valley morning

During a recent photo scouting trip to Newton County in northwest Arkansas, I spent a couple mornings shooting the country scenes of Boxley Valley which is just south of Ponca along Highways 43 and 21.

I was using a Sony alpha 200 on auto setting to shoot in early morning fog, rising sun, and then normal light conditions.

Here are a few of the shots and some info about them.....


A lone bull elk feeds in a farmer's pasture along the Buffalo National River at daylight. Elk will be entering the rut season in a few weeks and bulls will be bugling to attract cows and challenge any young interlopers who might pose a threat to leadership.

The best times for viewing elk in the valley and near Ponca is at daylight and just before sunset.

PHOTO NOTE: For best photos of elk along the river, a 300 mm or better zoom lens is best. Sometimes the herds will drift close to the fence line and offer an easy shot, but not often.
With the low light of morning (or evening) the camera ISO setting can be raised to a higher number, but a tripod or padded fence post is recommended to prevent camera shake and blur.


Ducks of several species frequent a marshy area along Highway 21 in Boxley Valley. It is not unusual to see geese and even swans at daylight and late evening.
PHOTO NOTE: Watch out for sun glare when shooting across water. You may have to narrow your sight picture to crop out the harsh sun rays coming into the camera or the intense sunspot on the water.


This lone morning glory vine along a farmer's fence offered a few sparse spots of color in an otherwise sea of green foliage.


Large, older barns like this one are common in the Boxley Valley area. Many are close to the highway like this one and make for easy shots. However, many of them have a lot of farm clutter that can distract from the rustic beauty of the structure.
The view through the hay mow of this barn shows a herd of cattle grazing along the Buffalo River.
Cattle and elk share the same graze land without too much trouble, but seldom do you ever see them in the same fields.


What country farm scene would be complete without a cat? This youngster was curled up asleep at the base of a fence post and followed me for nearly a quarter mile up and down the roadway, sometimes stopping to poke around in tall grass for a field mouse.

PHOTO NOTE: Whenever possible, try to shoot animals in as natural type setting as possible. This cooperative little critter seemed to like the attention I was giving and even let me place it on top of the hay for what looks like a posed "look at me" shot.......NEVER TRY TO PICK UP A WILD ANIMAL, AND BE CAREFUL OF OTHERS YOU DON'T KNOW.

Thursday, August 27, 2009

USS Razorback


The stainless steel steps in the ladder-well of the aft hatch of the ancient diesel class World War II submarine are worn smooth by numerous feet on untold missions all over the world.

They lead down to a dim and once-ominous world of danger.

That feeling is enhanced when you add the faint odors of various oils and greases emanating from now silent engines, along with the sight of massive torpedoes filling the cramped space.

Welcome to the USS Razorback (SS 394).


A visit to this war sub from a bygone era was the highlight of a recent vacation trip to the Arkansas Inland Maritime Museum in Little Rock, AR. www.aimm.museum.com

The decorated war sub (named after a species of whale, not hogs), served combat roles in World War II and Vietnam.

Launched in 1944, the USS Razorback entered Tokyo Harbor in 1945 and participated in the formal surrender of Japan at the end of WWII.

The Razorback was awarded five battle stars in the Pacific Theater in WWII and four stars during the Vietnam War where it participated in many covert operations with Special Forces troops, including Navy Seals. The vintage sub was also very active in the Cold War as well.

Many of the files regarding these special ops are still classified as “Top Secret,” though some files have been declassified and are available for public viewing on the Internet.

This honored veteran also served two nations, the U.S. and more recently Turkey, before it became a historical attraction at the Arkansas Inland Maritime Museum in North Little Rock.

The sub is rated as 90 percent functional — international law required the removal of propellers and batteries since it is a weapon of war and owned by a city. The Razorback has an overall length of just over 311 feet with a beam of just 27 feet and boasts 10, 21-inch torpedo tubes.

Currently tied to the dock and manned only by tourists and occasional military veterans groups, in its day the Razorback routinely dove to its capable depth of 400 feet during combat maneuvers.

Its crew of 75-90 men lived in Spartan conditions, including sleeping in berths just inches above racks of live torpedoes, as well as sharing just two showers and four toilets.

Deployments at sea usually averaged 45 days during wartime.

As you make your way to the forward hatch along narrow passageways, a myriad of gauges and handles, most still bearing identification tags written in Turkish, are within inches of your face.

And as you learn how to maneuver through the sub’s many hatches, you also realize there were probably no tall, fat submariners on the Razorback.

The maritime museum boasts a large collection of artifacts from the Razorback, including the ship’s original bell donated by its last American captain.

Several souvenirs are also available, from caps and T-shirts to stamped dog tags for the kids.

Admission is $6 for adults and $4 for children 12 and younger, for military (past or present) and seniors 62 plus.

The maritime group in charge of the sub is also in the process of restoring a section of berths to serviceable condition and offers special “sleep overs” on the sub for Boy Scout, church and veterans groups.

Outside the museum are the large brass propellers from the sub, along with a large deck gun representative of the type that once adorned the deck of the Razorback and other submarines and warships.

PHOTO NOTES: Camera used for submarine shots, Sony Alpha 200 with 18-75 zoom lens and regular flash.Lighting inside sub, although dim by outdoor standards, was sufficient and a larger flash was not needed. Even a small point and shoot camera should take excellent shots inside the submarine and the museum.

Whether you are an Ark. native, or a visitor to our wonderful Natural State, make sure a tour of the Razorback is part of your agenda.

And as the sailors always say, "Fair winds and following seas!"

(published with permission from the Batesville Daily Guard)

Monday, August 10, 2009

Cameras and eyeglasses

Anyone who doesn't have to wear eyeglasses should count their blessings, especially if they use a camera or computer very much.

As a wearer of eyeglasses since a youngster, I can tell you they are a hassle when trying to focus on a computer screen with small fonts and then look down at your key board.

A few years ago I started having trouble seeing my computer screen and the proofing pages at the newspaper where I work. This was a real problem.

I had my eyes checked, the eye doc gave me stronger bifocals, different size bifocals, triple focals, you name, he tried it. And even though I took samples of my newspaper proof pages, measured how far it was from my nose to the computer screen, what size font I had to work with, etc., nothing seemed to help. Until I voiced my frustration to Velvet Prewitt at Velvet's Optique in Batesville, AR.

With a just 20 minute visit to my desk on her way to work one morning, she took a few measurements, made a few notes and within just days I had a pair of mid-range computer glasses with bifocals that allow me to see the computer screen perfectly while retaining my reading ability of smaller print with the bifocals. My long distance vision is affected slightly, but inside an office setting I seldom notice the difference.

If you wear prescription sunglasses, you know the lens darkness can be so complete that peripheral light around the glasses can be so strong as to make you squint more than if you were wearing clear lenses in bright sun.

And the transitional lens that change in sunlight, and cold weather, can be a hassle too. In addition to staying dark on cloudy, cold days, you will often find yourself needing to take your glasses off when trying to use a camera's viewfinder because you can't be sure the exposure is right looking through dark lens.

These too were problems I had dealt with over the years all to no avail until again I talked to Velvet. Although her office doesn't do eye exams, she has been filling my optical prescriptions for years and has saved me lots of money on quality eye wear and knows what my day to day routine consists of.

The solution she found for this particular problem was to go to "tinted" prescription glasses with UV protection. I was able to choose the tint color and the darkness of the lens that serves me best. I chose a light to medium green tint and was able to put the new lens in an old frame, thus saving myself more big bucks.

This particular tint serves me well for everyday sunglasses, but when it comes time to take a photo, I still have enough clarity while focusing that I can pretty well tell what the exposure looks like without taking off my glasses.

I have found that eyeglasses, computers and cameras can coexist in a world of computers and cameras. Like a lot of things in life, it's just a matter of finding the right problem solver.

Monday, August 3, 2009

July 2009 is history! And what a busy month it was.
Working in a small town newspaper (Batesville Daily Guard) keeps everyone hopping to try to cover all the local events.

Of course July 4 was a big deal for everyone locally (Batesville, AR.) and culminated with a big fireworks show on the banks of the beautiful White River.

The explosions in the sky were great, and the reflections on the water, along with the smoke cloud that hung in the air added to the thrill of the event.

The 4th was my first opportunity to shoot fireworks with my digital SLR camera (Sony Alpha 200). But with a good advantage point and a decent lens I was able to get a few good shots. My biggest drawback was that the rockets weren't getting much altitude before exploding.

I used a tripod, slowed my camera shutter speed and used a 2 second timer delay to allow me to get my hands off the camera and prevent camera shake. To do this properly I needed a remote release, but that isn't in my arsenal yet as it is an infrequent need right now.


The next big event in July was the Independence County Fair which ran the week of July 21- 25.

Monday was fair booth set up day for the Guard staff, along with tieing up loose ends for sponsors. There were different events every day, including the traditional livestock, produce, crafts, photography judging, and of course a big midway full of rides! A fair goer registers for free gas at the GUARD booth.....note the special awards for achievements on the walls .......


The highlight of the fair for me was the first, and hopefully not last, Veterans Appreciation Day from 9-noon Saturday. Traveling Veterans Memorial displays 99 flags/photos, representing Arkansas soldiers that have died since 9-11-01.


Members of our local National Guard unit, Co. B were recognized for their service in the mid east and welcomed home. SSGT Jay Tipton addresses the gathered veterans.

Also recognized, or honored, were veterans from all branches of the services that served in WWII, Korea, Vietnam, Desert Storm, and most recently Iraqi Freedom. Those who have served on home turf were also honored.

Robert Hopper of Forrest City, AR. was present with his Traveling Memorial display. It consists of 99 American flags, posted with the names/photos of Arkansas soldiers who have died in service to their country since 9-11-01.

Robert lost a son in Iraq a few years ago and felt that our soldiers weren't being recognized properly and started the traveling memorial in honor of his son and others who have died.

In photo at right, Batesville Mayor
Rick Elumbaugh honors returning
soldiers from Iraq, (far right) soldiers close service.

*******Donations to the memorial may be made at.....
Arkansas Fallen Heroes Memorial
1588 S F C 340
Forrest City, AR. 72335


Each night also featured different musical entertainment, with the Saturday night headliner being country/pop singer Ronnie McDowell. He had a great show, still the same energetic, crowd pleasing entertainer I had the pleasure to MC for some 30 years ago in Clinton, IA. when I was a country DJ at KLNT.


Immediately after the Independence County Fair closed, the Sharp County Fair in nearby Ash Flat area began its run, leaning heavily towards livestock exhibition and competition.

Next it was time to gear up for the 66th annual White River Water Carnival, July 31-Aug.1, complete with golf tournament, beauty pageants, local "White River's Got Talent" contest....congratulations to winner Shane Sturdivant....and the biggest draw of all, A PARADE!

With a theme relating to famous U.S. Route 66, to keep with the 66th annual event, floats and entries paraded (no pun intended) down Main Street Saturday morning as thousands of people lined the streets.

For the second year in a row, and a huge success, the Guard sponsored a "Wet Zone" in an attempt to put the "water" back into the water carnival celebration.

The creativity of the newspaper's Ross Jones last year with the crazy water spraying van, was expanded on this year with air powered water canons, all to the delight of the crowds that lined the street in the "wet zone".

Being smarter that the average parade photographer, I positioned myself on a boom lift high above the parade (and any squirt gun that might get pointed my way) for some neat photos.

Just in case the threatening rains prevailed, or a lucky shot from a water canon came my way, I used a rain sleeve to protect my camera. If you ever shoot in wet conditions, rain, snow, water sports or wild parades, this little $8 (pack of 2) gadget is a must have.

Our idea of a wet zone was so popular that a photo of our company van got featured on the cover of our local/regional phone book! That's almost as good as the thrill of a picture on Rolling Stone!

Another big part of the water carnival is a carnival and water show at Riverside Park on the White River....among the talent there was CJ Robey (left in duo) and Mary Wood giving ski demonstrations and pro wake boarder Rusty Elumbaugh catching air.......


So, thankful that July is over, August should offer some R&R time, perhaps a camping/photo trip along a trout stream or a remote spot on the Buffalo National River valley......(fair and water carnival photos by Tony McGuffey, used with permission from Batesville Daily Guard newspaper)

Thursday, July 16, 2009

How to shoot and sell incident photos to local newspapers

It's evening rush hour, the aroma of pizza fills your car as you head home, you turn the corner and suddenly right in front of you is a three-car pileup with emergency workers swarming everywhere.

Looking around for an alternative route, you notice no one is taking pictures. This is where you grab your digital camera off the seat beside you and go to work!


Action shots from a wreck, fire, flood,
blizzard, etc. could put money in your pocket.
Although newspapers have their own staff, they are often stretched to the limit and can't be everywhere at once, or they re so far away they arrive too late to get all the good action shots. That's when being at the right place at the right time can pay off. But there's more to it than just being in the right place.

Contact the editors of your local papers ahead of time to see what their policy is for accepting submitted photos. If they are willing to accept your photos, find out what their pay scale is. Usually they pay for only what gets published. And until you establish a reputation as a good source of photos, don't look for much,
or photo credit on your work.

Chances are there are low key sporting and community events that aren't covered by the paper on a regular basis. These events are good place to improve your photography skills and perhaps sell a few shots to gain acceptance by a newspaper. Remember, action is key.

Once you know your photos have a chance of being used, stay alert to what's happening around you and keep your camera loaded with a large capacity memory card and fresh batteries.

It doesn't have to be an expensive camera, but a mega pixel value of 7 or better is recommended, along with a 12 power zoom lens. With these cameras the print quality is very good, even up to poster size, and the zoom ability allows you to make tight, close-up shots without getting in the way of emergency workers.

No matter how good your camera is, the final results rests with your ability to compose your shots. You need to develop an "eye" for good shots and remember, "action" is the key element for photos used by newspapers.
As you approach your (photo) target area, staying on public property, take wide angle shots, shooting everything you see, like accident debris strewn along a highway, victims sitting at the side of the street holding a bandage to their head or bystanders trying to console family members or victims at a fire. NEVER, I REPEAT, NEVER TAKE PHOTOS OF A DECEASED PERSON AT AN ACCIDENT SCENE! Not only is this in poor taste, it can get you sued in a heart beat!

Next, narrow your focus to close-in action shots of paramedics loading patients onto ambulances or helicopters. Firefighters, using the "jaws of life" to pry open doors to free trapped victims, always makes a good shot.

Look at the faces, expressions of strain, concentration, pain or anxiety can say volumes. But, be careful not to let your enthusiasm get you into trouble or hurt.

Stay out of harms way, whether from a burning building, gun fire, fights, speeding traffic or a limp fire hose that suddenly whips about when instantly charged with hundreds of pounds of water pressure per square inch (it can snap a leg like a toothpick).

Also, stay on public property, sidewalks, streets, city parking lots, etc. Don't go onto private property without permission. Get the name of the person giving you permission to enter private property and make a note of it somewhere, along with the time and location.

Get to know as many firefighters, policemen, rescue workers, paramedics and utility workers as possible. Don't expect them to bend the rules for you, but if they know you and you mind your P's and Q's, they are less likely to run you off and may give you an on-scene tip once in awhile.

At first you might want to make available to the editor a copy (burn a CD/DVD) of every photo you have and let them pick and choose. Then as you gain more experience, you do the picking and choosing, giving you more control of your work.

As you improve, start looking to larger newspapers when you come across a story that is worthy of state-wide attention.
Occasionally, insurance companies may to come to you willing to pay good money for photos that can help their case. Especially in wrongful-death suits resulting from auto accidents, etc. These prices sometimes are negotiable, but don't get greedy. In a large city there could be repeat business from these agents.

Warning, being in the right place at the right time is one thing, and chasing police cars, fire trucks and ambulances with a police scanner is something else.
If you employ a scanner to alert you to a nearby incident, remember to obey all traffic laws while en route. You are a private citizen and don't have special privileges that allow you to run red lights, bust stop signs and drive 90 miles an hour in city traffic.

Once near the scene, park away from the incident and walk in, don't add to the traffic congestion. Follow directions and orders of emergency workers on the scene, they are in charge. If they need you to hold the end of a roll of caution tape, do it. Learn to take photos with one hand.

Since you are at a scene in no official capacity, you might want to try this little trick to give you some breathing room. Wear a ball cap or reflective utility vest bearing the word PHOTOGRAPHER.

Remember, determine if there is a market, submit as much as you can, perfect your technique (take photography classes if necessary), and always look for another market that will allow you to expand.

Good fire photos, showing flames and action, are always in demand. In daytime these are fairly easy to obtain, just concentrate on composition.

But at night, well that's another story. Here lighting/exposure is critical. This means you will have to have a stronger flash than just the pop-up, strong light from another source or putting your camera on a tripod (recommended ) and bumping up the ISO setting to 800 or better.

Once you have stabilized the camera and increased ISO, set your camera's self timer to 2 to 10 seconds, focus, push the button and immediately remove your hands to avoid camera shake which results in blurry photos.

Another technique that often works with a tripod mounted camera is to simply turn the flash off and use what light is available.

Notice the reflective strips and letters on firefighters turnout gear, too much flash and they will wash out your shot, a lot if it is trial and error, so take lots of pics with different settings.

And remember......Keep your batteries hot and pack a big card.

Saturday, July 11, 2009

T Mac Photos

Welcome to the first posting at T Mac Photos, the site all about photography, the outdoors, travel, and people who love to do them all.

On this blog I hope to share some of the photos and information about trips that my number one assistant (wife Roberta) and I have had the fun of making over the past couple of years. Trips include many in the Natural State of Arkansas, like Pedestal Rock at Pulsar, the bluffs at Calico Rock along the White River, (shown above) as well as cross country road trips into places like South Dakota and Wyoming.
(moose in Snake River, Teton National Park)

I've recently had the privilege of passing on my love of photography and the outdoors by teaching "basic beginning photography" classes at the Batesville Area Arts Council.

Students in every class are great to work with, and it's really rewarding when someone finds the answer to a photo problem they have been dealing with or discover one of the "neat" settings on their camera for the first time, or learn how to overcome lighting problems by simply chan
ging a camera setting or using the reflective sun shield from their car.

One recent student was ecstatic when she learned how to slow water flow to obtain a silky effect. And, during the class field trip, it was hard to get her away from the gushing Blanchard Spring Cave and nearby Mirror Lake waterfalls (shown here).

Other students have told me that just learning how to find and use their camera's menu settings has given them a whole new perspective on photography, and freed them from the "auto" setting forever.


From time-to-time, we will be sharing with you some of the photo tips and techniques used in those classes, I hope some of them will help you take better pictures.

Also, watch for a schedule of guided fall (2009) photo tours coming up in the
Ozarks around Batesville, and the Boxley Valley area (including Hawksbill Crag-right) along the Buffalo National River in Newton County, AR.

Thanks for visiting us and come back often, Tony.